
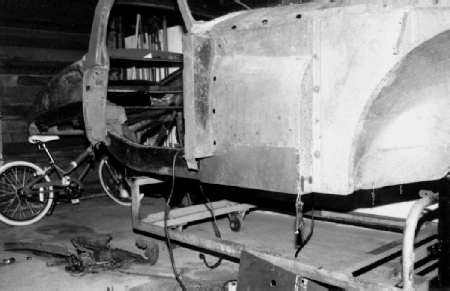
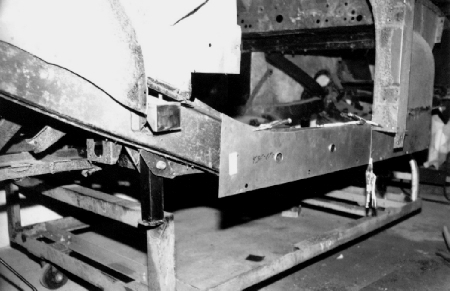
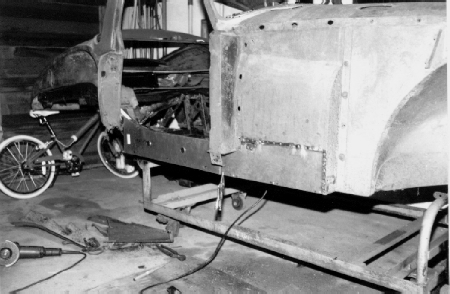
I have posted 15 pics of the sill repairs I've done on my coupe. They are gray scale and I kept the resolution down to 100x100 pixels to keep the loading time down. They are spread over five pages. I have added a brief narrative to go with these, but feel free to ask questions. The right side was the simpler repair since the front door post and the top half of the rear post were retained. There is one pic on the left side that shows the fenders and door in place for fitting. Please keep in mind that nothing was welded up until everything fit properly. Sheet metal screws were used to hold everything in place when trial fitting. The fenders and doors were probably on and off a dozen times on each side before any welding was done. I have a plasma cutter and a pneumatic spot weld milling cutter that were used to remove the old panels, I used both a MIG welder and a panel spot welder to attach the new metal. The insides of the inner sills were sprayed with a weld through cold galvanizing compound first and then the exterior of the inner sill and inside of the outer sills received the same treatment. The body is bolted to the chassis which was then mounted on a trolly that I adapted which made it easy to move |
around. After the sills were done the body was remounted using a jig made of 2" square tubing that replaced the chassis and gave access to the inside of the sills. The shell was media blasted and primed on that setup which is the last photo. |
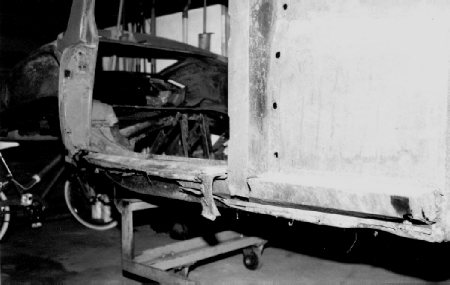
The inner plate is kept parallel to the lower edge of the chassis and the top edge even with the inside sill sealing plate the upturned flange of which is just visible to the left of the top edge of the inner sill. Some trimming of the pieces was required. A new body mounting bracket is in place and the lower half of the rear door post has been cut away. |
The lower portion of the inner panel was full of holes so a section was cut out and a new piece of steel was let in. I used a panel flanger (available from Eastwood ) so I could lap the top edge and still have a flush fit on the inside. Later, I ran a continuous bead down the inner seam and ground it flush. |